Swift iOS Tutorial: Taming UITableView Visual Blur and autolayout

This is the part 2 of Swift iOS Tutorial series : Building a Photography inspiration app if you haven’t looked at the part 1 I strongly suggest you to complete that part before continuing.In the previous post we have successfully converted the json into a domain specific model like Photo. Instead of dealing with json directly we will be using the photo model in our view controllers.UITableView is one of the versatile class which can be used in many different usecases. We will be using UITableView to display a list of Photos in our application along with the exif data associated with the Photo.
Lets get started with our app in Xcode 6.
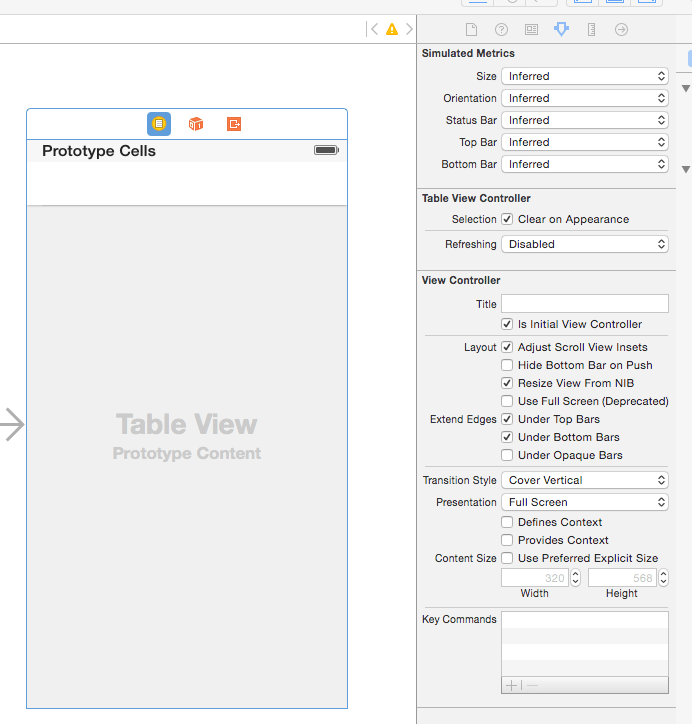
- Delete the existing viewcontroller on the mainstory board and drag a uitableview controller from the object library on to the mainstory board.
- Create a
PhotoListControllerclass which is a subclass of UITableViewController. - Create a
PhotoCellclass which will be a subclass of UITableViewCell. - Select the
PhotoListController and in the identity inspector set the class asPhotoListController.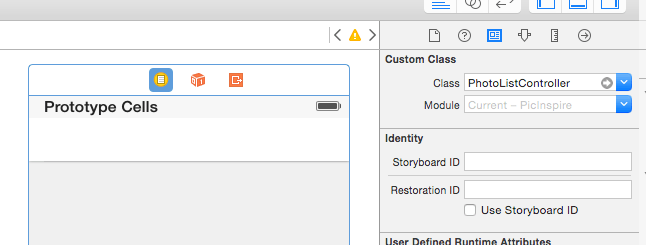
- Similarly select the
PhotoCelland set the class asPhotoCell. - Next step is customizing the
PhotoCell.- Drag a imageview
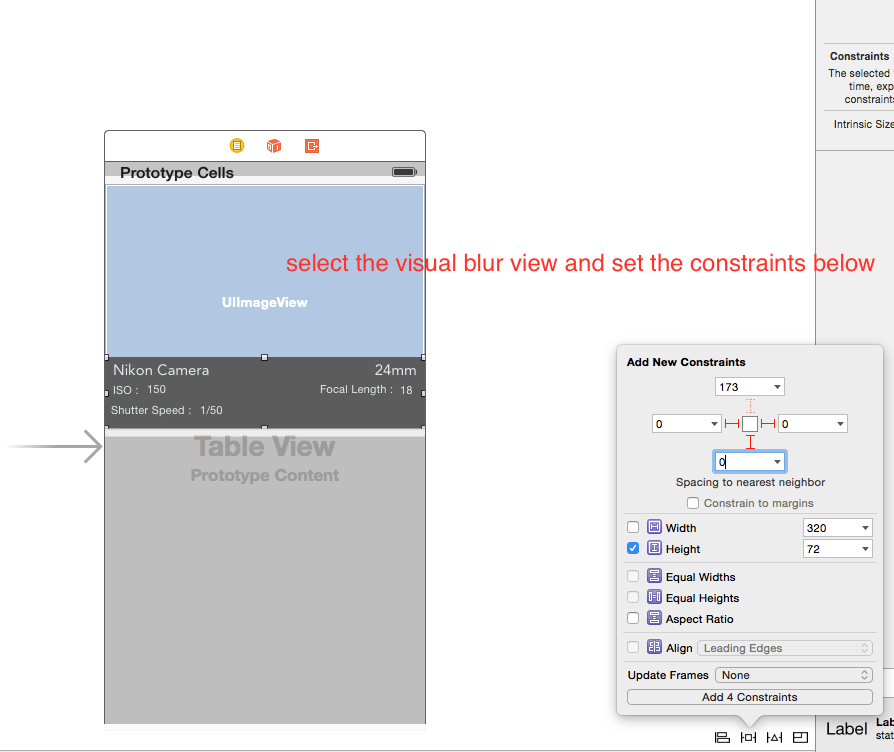
- Drag a visual blur view on top of imageview at the bottom.
- Drag multiple uilable for each of the camera, iso, shutterspeed etc.
- Select the element and arrange them approximately how you want them to be laid out.
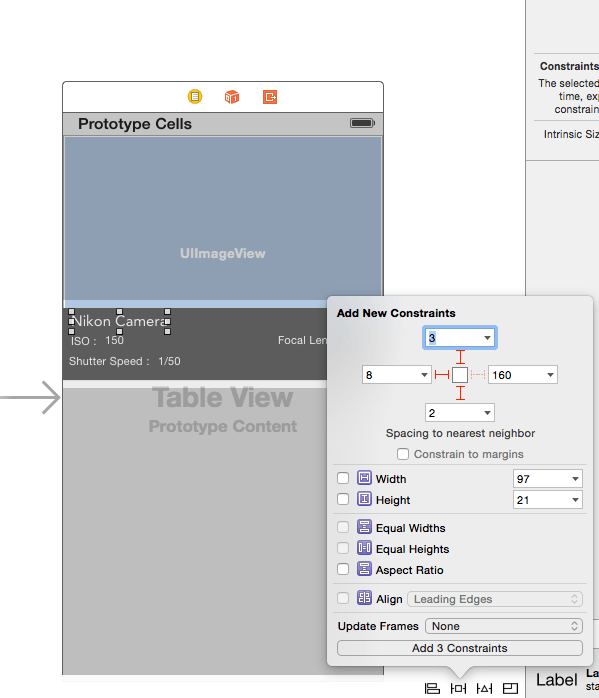
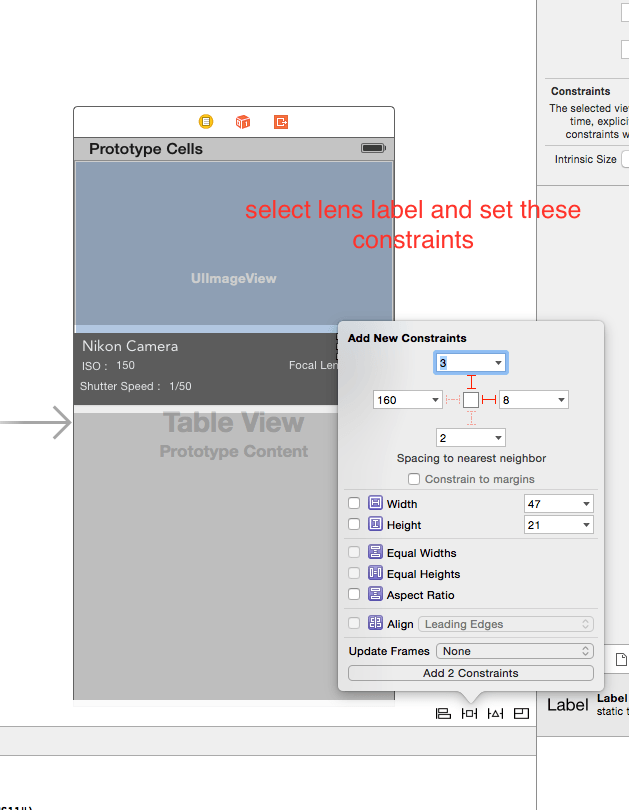
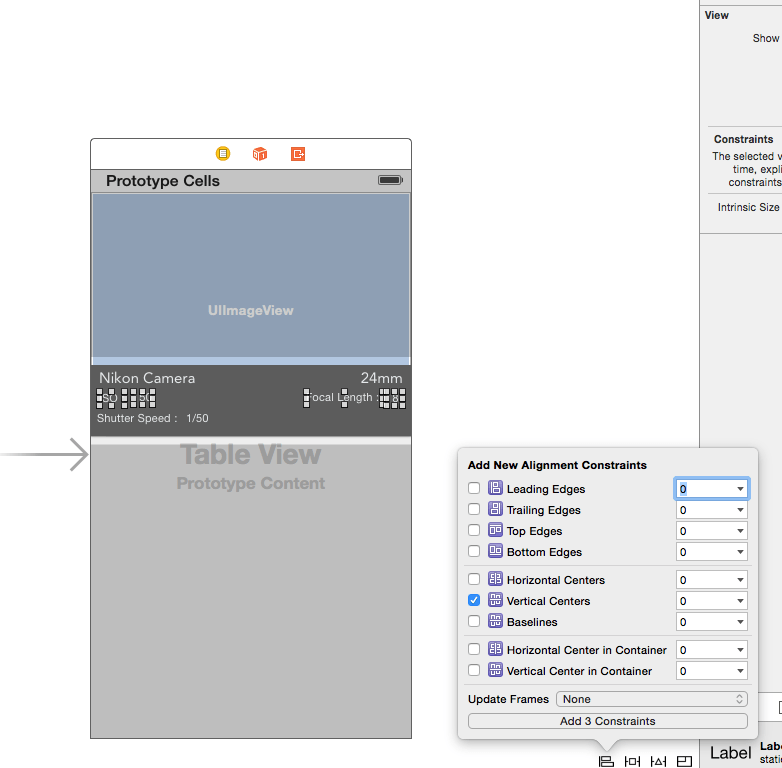
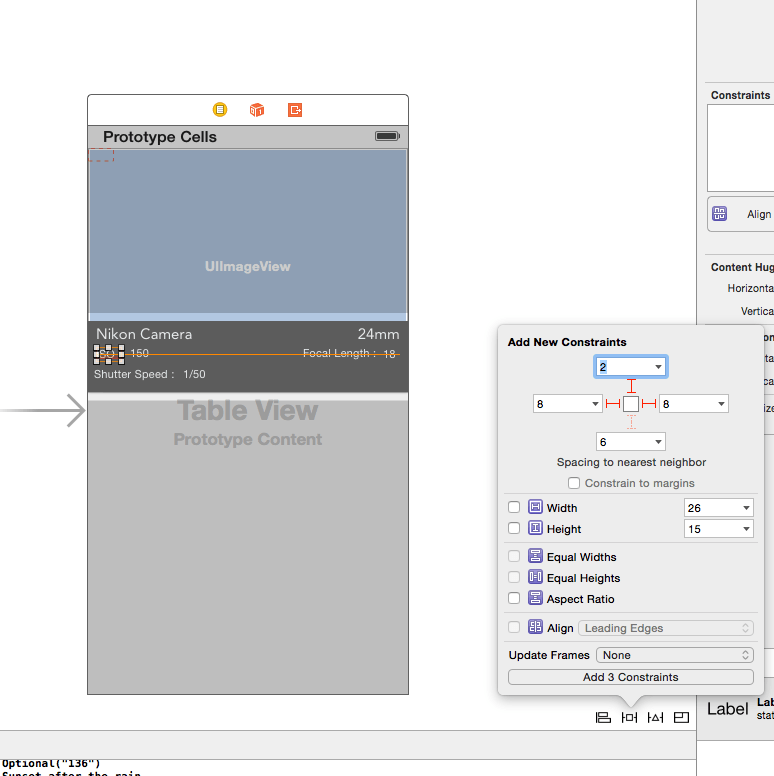
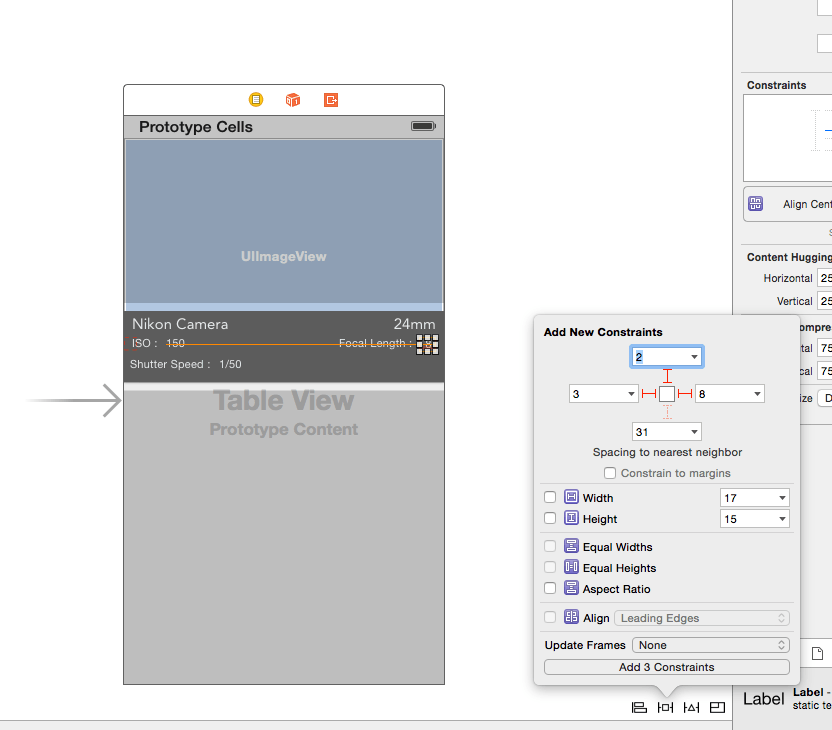
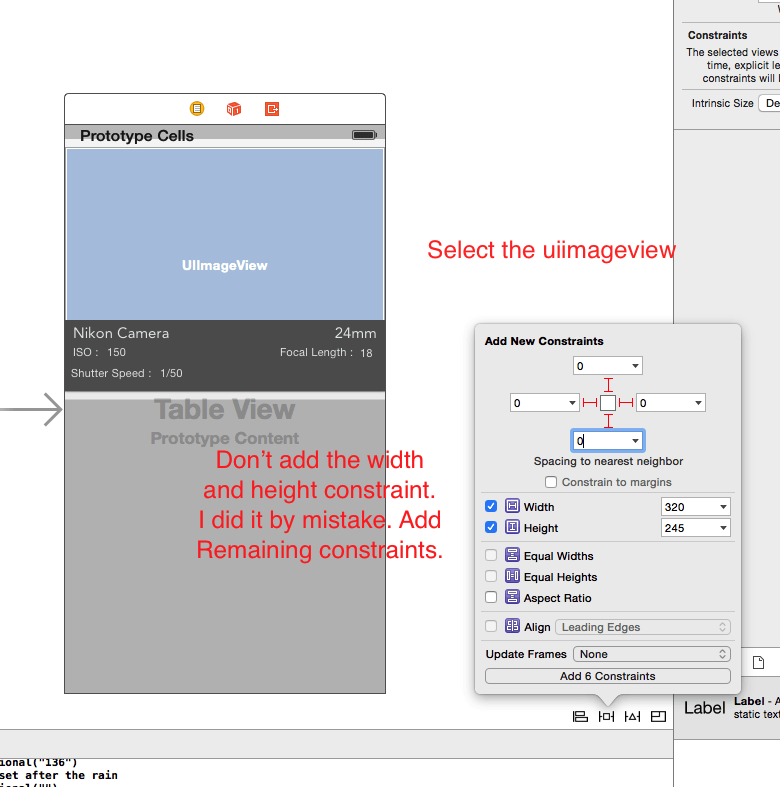
Autolayout Constraints.
The next section of the blog deals with how to setup the autolayout constraints for individual elements. If you prefer watching a video here is the link
<iframe src="https://www.youtube.com/embed/_U-eXneUnQY" width="560" height="315" frameborder="0" ></iframe>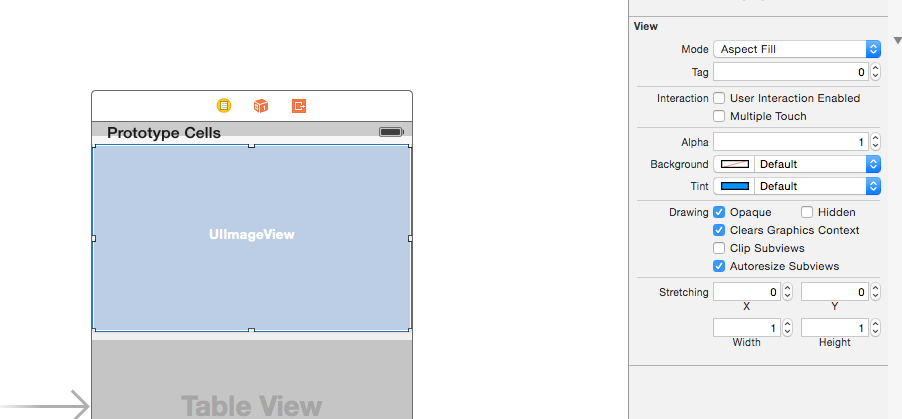
Creating the IBoutlets
Once you have the autolayout constraints setup properly. Open the mainstory board select the PhotoCell and CTRL+DRAG from all the labels, imageView and the visual blur onto the PhotoCell.swift
//
//  PhotoCell.swift
//  PicInspire
//
//  Created by Shrikar Archak on 3/14/15.
//  Copyright (c) 2015 Shrikar Archak. All rights reserved.
//

import UIKit

class PhotoCell: UITableViewCell {

    @IBOutlet weak var posterImageView: UIImageView!

    @IBOutlet weak var camera: UILabel!
    @IBOutlet weak var blurView: UIVisualEffectView!

    @IBOutlet weak var shutterSpeed: UILabel!
    @IBOutlet weak var iso: UILabel!
    @IBOutlet weak var lens: UILabel!

    @IBOutlet weak var focalLength: UILabel!
    override func awakeFromNib() {
    }

    override func setSelected(selected: Bool, animated: Bool) {
        super.setSelected(selected, animated: animated)
    }

}
PhotoListController
PhotoListController.swift is mostly boilerplate UITableView code which will setup the numerOfRowsInSection and the cellForRowAtIndexPath correctly.
//
//  PhotoListController.swift
//  PicInspire
//
//  Created by Shrikar Archak on 3/14/15.
//  Copyright (c) 2015 Shrikar Archak. All rights reserved.
//

import UIKit

class PhotoListController: UITableViewController {
    let manager : PhotoManager = PhotoManager()
    var photos: [Photo]!
    override func viewDidLoad() {
        super.viewDidLoad()

        manager.getPhotos(["tag":"sunset","only":"Nature","image_size":"4","rpp":"100"], completion: { (photos, error) -> () in
            self.photos = photos
            self.tableView.reloadData()
            for photo in photos {
                println("(photo.name!)")
                println("(photo.lens)")
                println("(photo.shutterSpeed)")
                println("(photo.camera)")
                println("(photo.focalLength)")
                println("(photo.iso)")
            }

        })
    }

    override func didReceiveMemoryWarning() {
        super.didReceiveMemoryWarning()

    }

    override func numberOfSectionsInTableView(tableView: UITableView) -> Int {
        return 1;
    }

    override func tableView(tableView: UITableView, numberOfRowsInSection section: Int) -> Int {
        if let tphotos = self.photos{
            return tphotos.count;
        }
        return 0;
    }

    override func tableView(tableView: UITableView, cellForRowAtIndexPath indexPath: NSIndexPath) -> UITableViewCell {
        let cell = tableView.dequeueReusableCellWithIdentifier("PhotoCell", forIndexPath: indexPath) as PhotoCell
        cell.posterImageView.image = nil;
        let photo = self.photos[indexPath.row]
        cell.camera.text = photo.camera
        cell.lens.text = photo.lens
        cell.shutterSpeed.text = photo.shutterSpeed
        cell.iso.text = photo.iso
        cell.focalLength.text = photo.focalLength
         /* AFNetworking extension for loading images async */
        cell.posterImageView.setImageWithURL(NSURL(string: photo.imageurl!));
        return cell
    }

}